
In this blog lets have a look at how we Configure App Volume Manager
Once the installation has been completed, the configuration wizard is displayed. Click Get Started to proceed with the configuration.

Click Edit to insert a different license or click Next to keep default license.

Specify the AD Domain Name and enter the Username and Password to access the Active Directory. A user with read-only access permissions will suffice. Set the Security level (LDAP in the example) and click Register

The Active Directory domain has been registered successfully. Click Next.

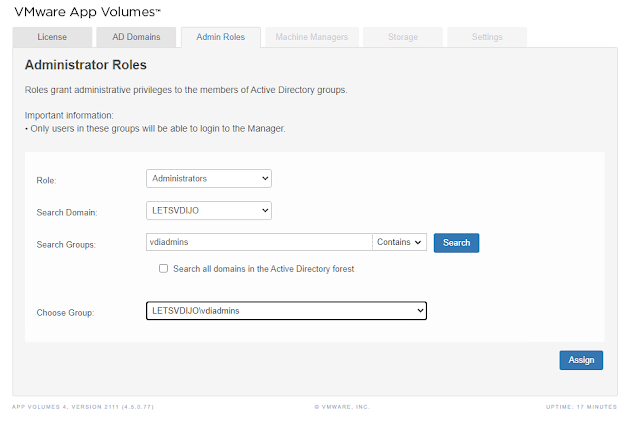
Specify the AD group to assign the Administrator role. Enter the text in the Search Groups field, click Search and select the desired group in the Choose Group drop-down menu.
Once the group has been assigned, click Next to continue.


Click Accept button to accept the vCenter certificate.

When the vCenter Server has been registered click Next.

Select the Default Storage Location for both Packages and Writable Volumes to use then click Next.

Select the desired Storage Setting option (in the example the Import volumes in the background option has been chosen) and click Set Defaults.

Select the requested templates then click Upload. Select all templates to have all available options to Writable Volumes.

Leave default values and click Save.

Click OK to complete the configuration wizard.

In our next blog , we will cover the creation of Writable Volumes to save user's profile information to your virtual desktops.


0 Comments